And SEW it Goes! It’s the end of September and the warm days are winding down. Before we know it, we’ll be working on those holiday quilting projects again. I spent the better part of my day going through a box of patterns. Some of these are from projects I’ve already finished, and others are for projects I have yet to start. For the most part, I only work with a pattern ONE TIME and then move onto the next project, but today I found an exception.
The exception is pattern called Afternoon Delight published by Elisa’s Backporch Design
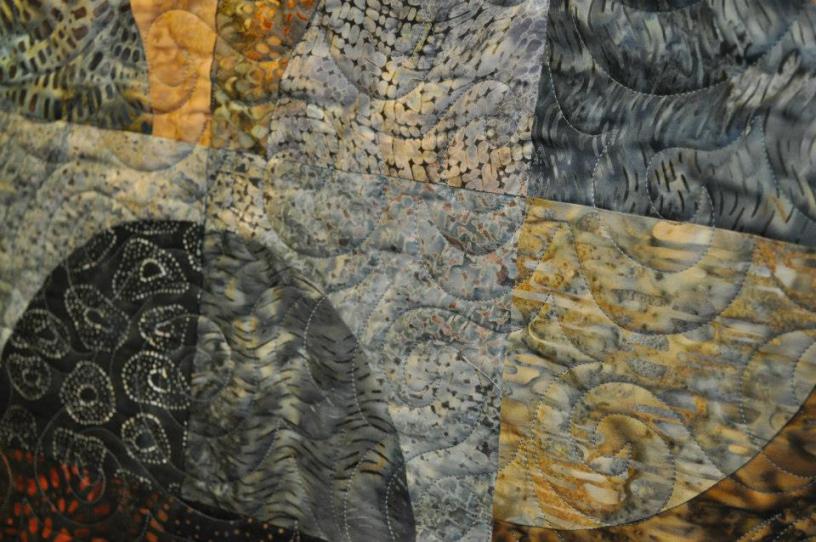
The first time I made this quilt I used a kit purchased from Keepsake Quilting called Earl Grey. The kit contained everything needed to get started. I wanted a bigger quilt so I purchased additional yardage so that my quilt would be larger than the one in the pattern. I really enjoyed working on this project and the result was stunning!

The exciting thing about working with this pattern is the various number of ways you can arrange the blocks and the different looks you can create simply by changing the arrangement of the blocks and/or the color value of the fabrics.
As I said a minute ago, I usually only make a pattern once (there are too many other projects to make). I made this quilt last year, I called it Mocha Moons, but it no longer belongs to me. I had a friend fall in love with Mocha Moons and – to make a long story short – it no longer belongs to me. But that’s okay because I’m making another one for myself. This time I’ll be using purples, teals, and blues instead of the neutral palette of grey, beige, and brown.
 The pattern recommends using 7” Crazy Curves Template set to make cutting easier and more accurate. I purchased these templates along with the pattern and was very happy to have them. I’ve used paper templates before and they definitely made cutting go quicker. I wouldn’t make this quilt without these handy tools.
Now, I’m ready to make this one again, and this time I will be keeping it for myself. The new quilt will use the same templates, but I may piece the blocks together in a different arrangement. I’m thinking Chai Spice Tea, a simple variation of the original Afternoon Delight.
Since I’m making this quilt again, I’m reminded of the things I learned about piecing curved blocks the first time I made this quilt. With hope, these tips will inspire you to try curved piecing and perhaps even try the Tea Inspired designs from Elisa’s Backporch Design.

Sewing curves can be tricky, as I learned with this quilt. Our brains want to align the pieces together, but it doesn’t work quite that way. Here are a few tips for sewing curves to help you get started:
- Be sure to keep your seems a consistent ¼”. Adjust the position of the needle on your sewing machine and use the edge of your foot to keep you on track
- The templates are marked “A” and “B”. The “A” is the concave shape – I call it the SMILE. The “B” is the convex shape – I call this the FROWN. When I piece the blocks I place the SMILE right side up, on the bottom, with the corner to the left. I place the FROWN on top with the centers aligned at the curve. Where the SMILE meets the FROWN.

- Follow the one pin method. Elisa’s instructions for the Crazy Curves Templates are absolutely wonderful, and she outlines several different methods for you to try. I did just that, and found what worked best for me.
- Start with the edges of each piece aligned at the needle and presser foot and begin slowly. Following Elisa’s instructions, use your finger to guide the bottom fabric and keep it even with the edge of the foot.

- Slowly guide the block around the curve. As you get halfway around the curve, hold the last edges and guide them together as your needle approaches the end of the fabrics.
Cutting and sewing is going to be a breeze the second time around. I’m hoping to start the second Carefree Curves project as soon as I settle into my new quilting space!
If you want to find excellent instructions for piecing curves that fit just right, check out these links for video tutorials:
- Sewing Curves with Donna Poster: https://www.youtube.com/watch?v=RFsyF0t7nM8
- Quilty: How to Make a Pie ‘N’ Crust (Drunkard’s Path) Quilt Block with Mary Fons https://www.youtube.com/watch?v=nkyWIemgRIM

very informative lesson on curves. I like your color combination for your next quilt. I know your first one was quite the masterpiece.